

Welcome to the fourteenth day of Blogmas with Sara Laughed, where I’m blogging every day ’til Christmas Day. Head over to my Blogmas calendar to see the full collection, or click on the gift tag below!

Last year, my friend Taylor decided that she needed a hobby, so she picked up watercoloring. Within a week, she was a pro, and we were all basked in the glow of her watercolor prints as gifts, door tags, and cards.
Obviously, with an ocean separating Taylor and me, I miss her a lot. She’s been sending me pictures of the cards she’s working on during the last few weeks, and it inspired me to do so a little painting myself. She’s definitely the painter between the two of us (what I’m saying is, mine aren’t nearly as good as hers) but that should only show you that the following cards are achievable for someone of any skillset!
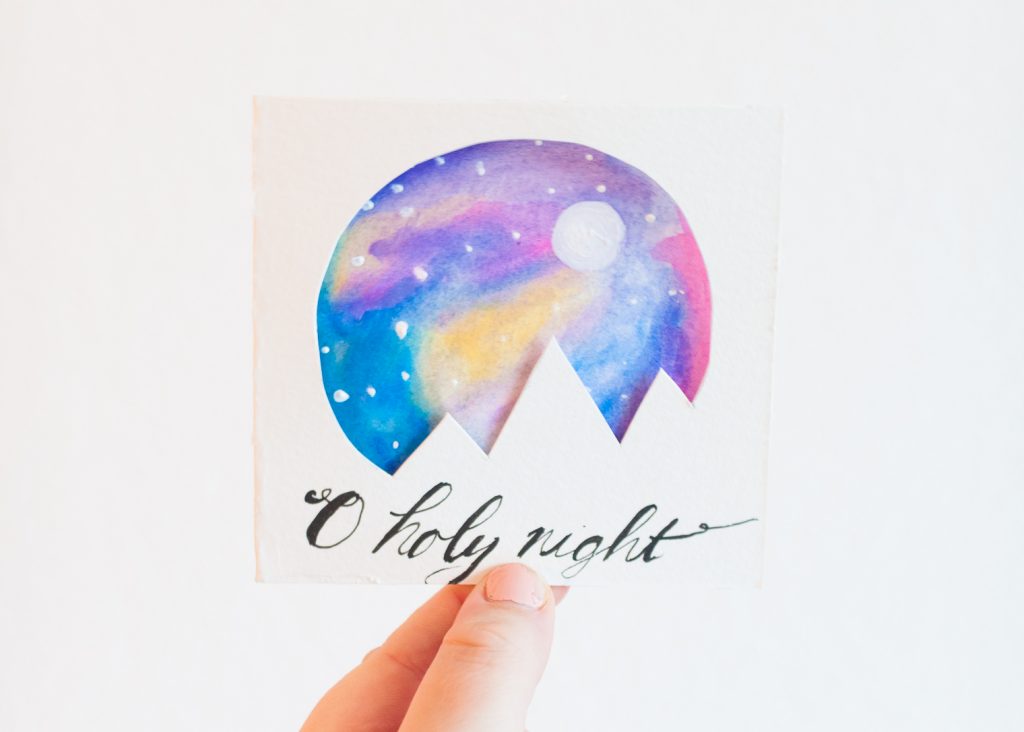
This first card was really fun to make, and you can easily recreate it with watercolors, watercolor pencils, or oil pastels. First, create your card base by folding a rectangular sheet of watercolor paper in half. Now sketch the outline of your mountain scene, and, using a craft knife, cut out the central area to be your “night sky.”
Now fold your card in half so that it’s closed, and using a pencil, very lightly trace the outline of the border onto the inside of the card. This should show you where to paint. Using watercolors or your preferred medium, mix colors together to create a vibrant night sky. Once it’s dry, you can add stars with white paint or a gel pen.
To finish this up, I wrote “O Holy Night” on the bottom, but that’s certainly optional!
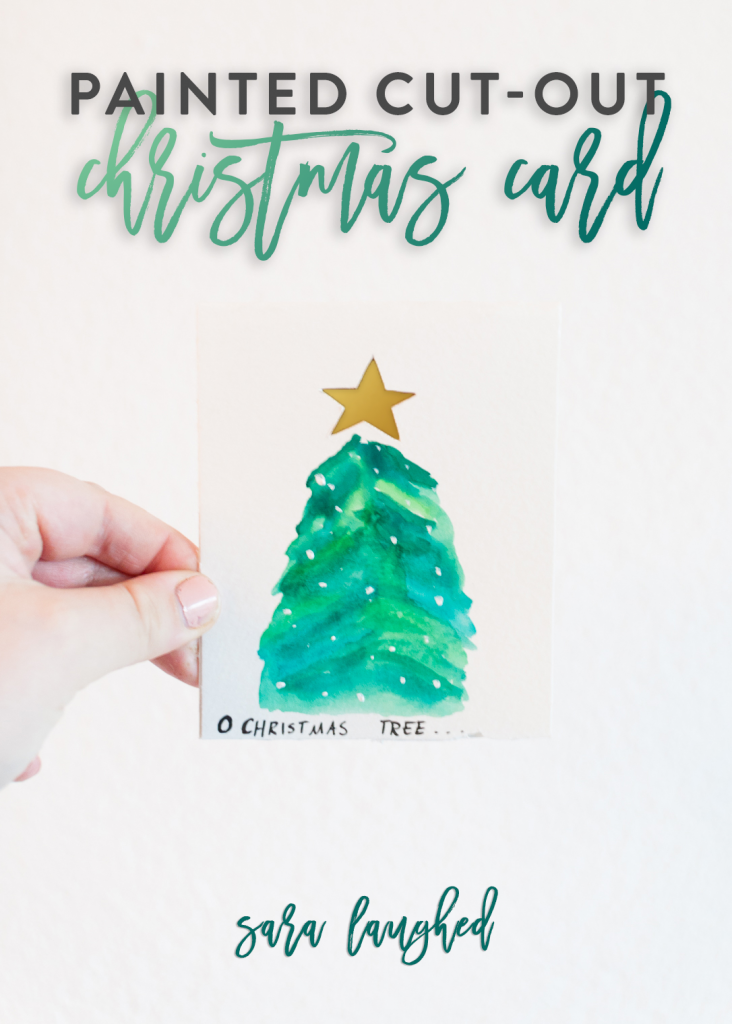
This one is easier than the last! Create a card base and then draw a star on the front, where you want the top of your Christmas tree to be. Using a craft knife, cut the star out. Be sure to erase any stray pencil marks.
Next, take a small piece of gold paper and tape it to the inside flap of the card, so that the star has a gold texture. Now paint your “tree” below the star, adding ornaments after the initial tree has dried. That’s all!
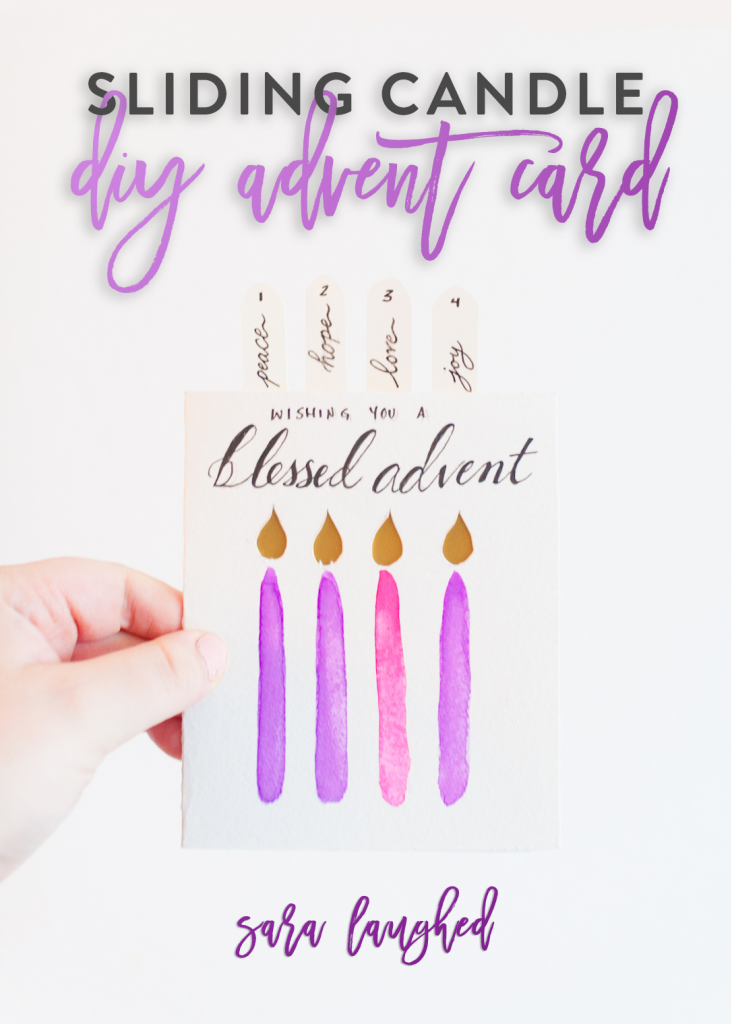
This card is by far the most difficult if you want it to be interactive. Not sure what I’m talking about? This card has four slides so that you can “light” a new candle each week.
Before I show you this tutorial, I’d like to apologize for the terrible quality of the following photos. Unfortunately I lost the original files and have to use these, which are lower in quality. I hope they can still demonstrate how to make this!
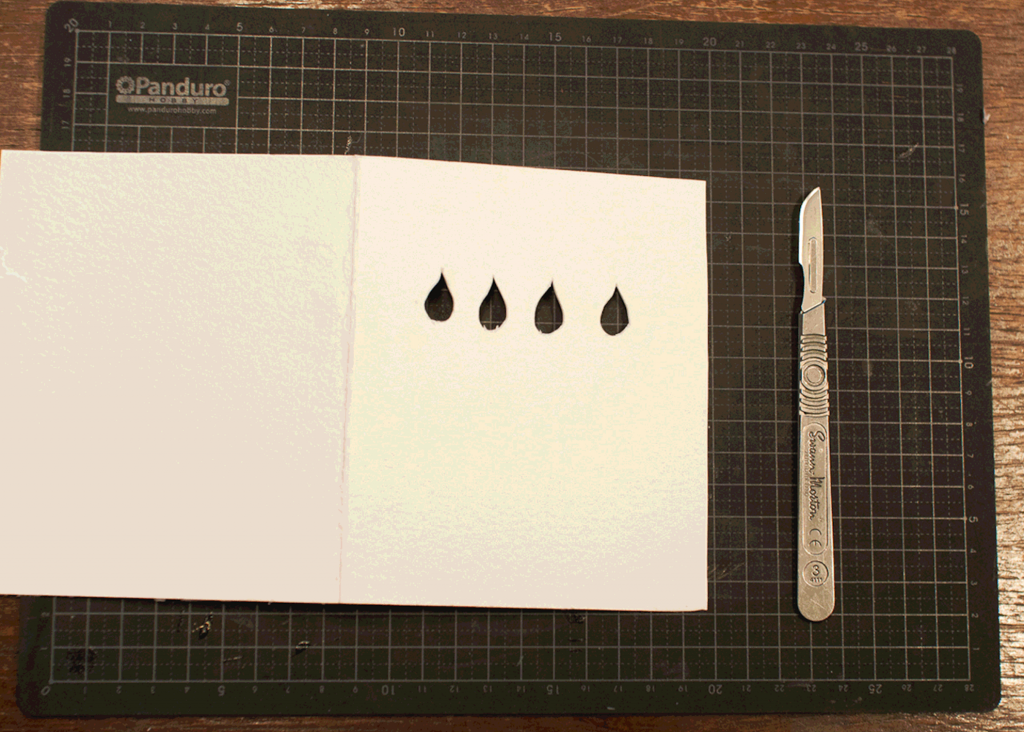
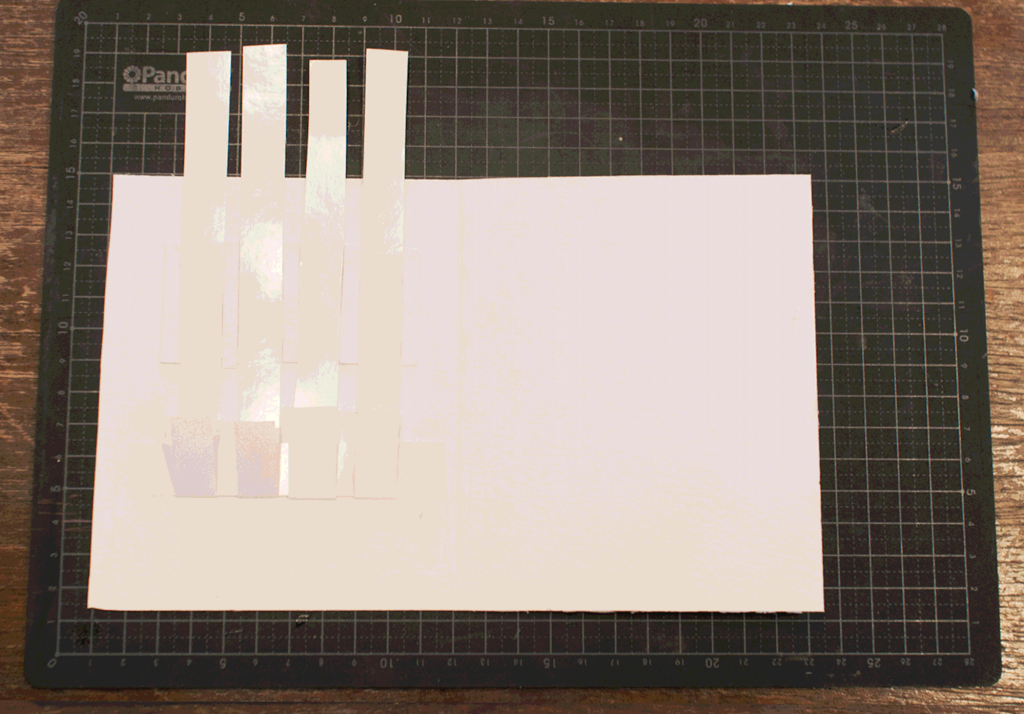
To make the Advent slider card, start by cutting out the four flame holes in your card base.
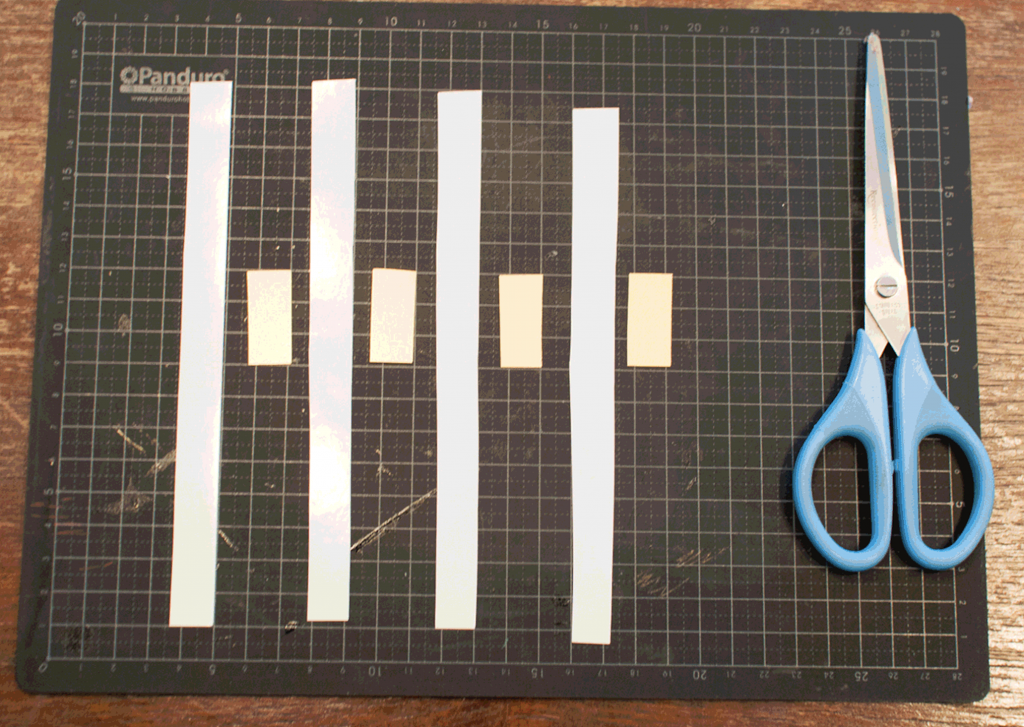
Next, create four “slides” that take up the width of your flame hole. The slides should be a white strip of paper that is the approximate width of your flame and about two inches longer than your card (you can trim them later).
Now cut out four small rectangles of gold paper.
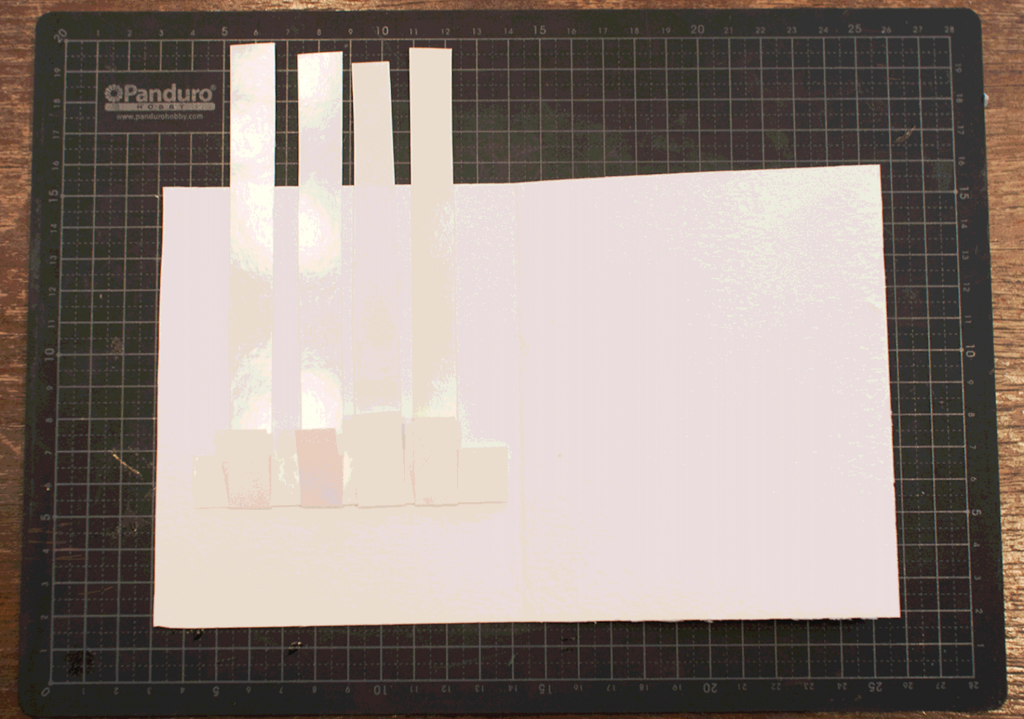
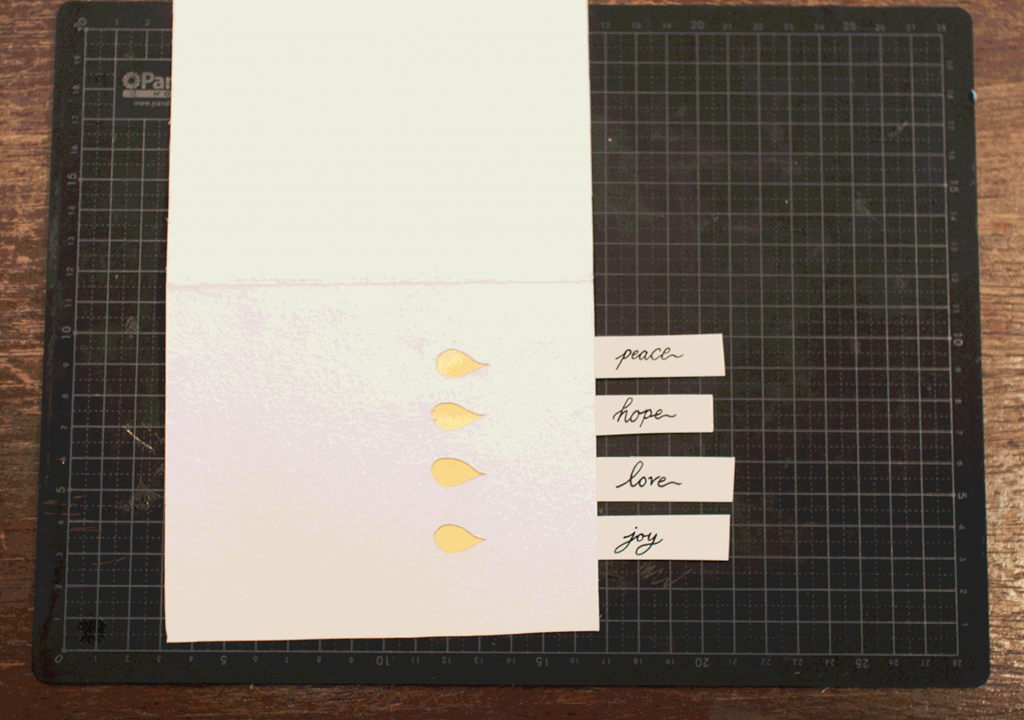
Next, create the “stopper” for your slides by cutting out a white rectangular piece of paper and taping it across the bottom of the card. Position your four slides so that they align with the flames, and fold up the bottoms so that they will “catch” in the stopper when pulled upwards.
Once the slides are in this position, you should be able to see where the flames will appear on each slide. Flipping the card over and using a pencil, trace the flame shape onto each slide in this position. Now remove the slides and glue a gold strip over the area where you traced each flame. This way, when a slide is pulled, the gold will appear behind the flame hole.
Now comes the tricky part. Using some cardboard or thick watercolor paper, cut five very thin strips to place in between each slide. You’ll have to do some adjustment to see that the slides don’t wobble when they’re between the thicker stuff, but also don’t have too hard a time being pulled.
Now cut a large white piece of paper to glue over this area so that it’s invisible.
Flip the card over and write on the strip ends the themes of each week, if desired.
Finally, paint your candles and write anything you wish on the card.

If that last tutorial feels a little too difficult for you, just start with one of the others and see how it goes. These cards are supposed to be fun, so don’t be afraid to follow your own inspiration and intuition and see what you come up with!